 12-02-2012, 01:14 AM
|
#1 | ||

    Join Date: Mar 2006
Location: ,
Posts: 4,615
|
The ultimate solution to a compatibility problem where a program won't run in a hardware environment or an operating system that aren't the ones it was designed for, is of course to have that old hardware and OS handy, and install the program in them. The good news is that it's not necessary to have this hardware really: a virtual machine (VM) is a software program emulating a computer, running inside our real PC. Programs installed inside the virtual machine will behave as if, and believe that, they're running in the hardware the virtual machine is emulating. And we can install any OS in that hardware, as if it were a physical machine. An image is worth a thousand words, so:
(click to enlarge) 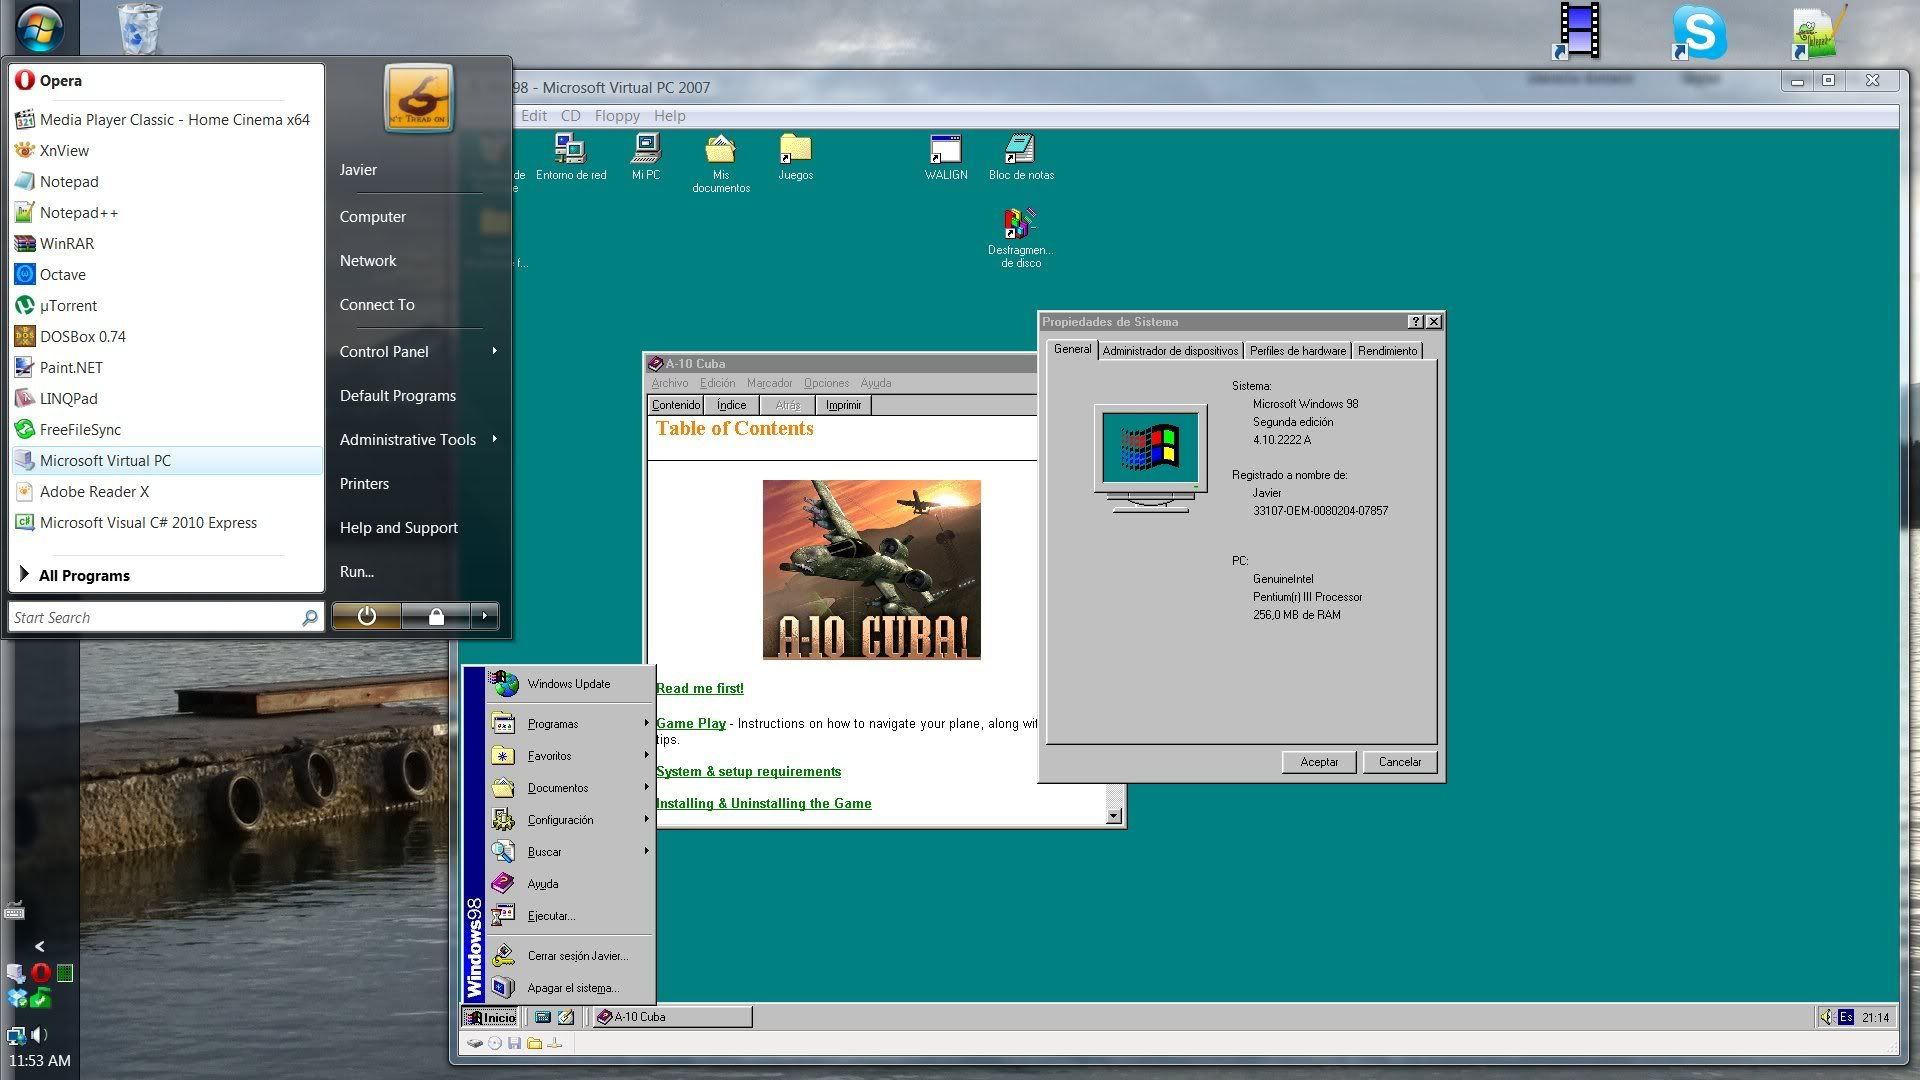 This isn't so hard to accomplish, you don't need to be a computer wiz. First of all there's the question of which operating system you want to emulate. This tutorial recommends Windows 95, 98 or Me (called "Windows 9x"), and for a good reason. These versions, unlike XP and later (and NT and 2000) can run 16-bit Windows (old Windows 3.x and earlier) and DOS programs natively; and they don't have user accounts with restricted access which could cause problems with old programs. This means that with the virtual machine we'll set up in this tutorial we should be able to run any Windows program made from the dawn of time (1985, Windows 1.0) to 2001 and beyond--and any one not covered will most likely run just fine in Windows 7, Vista or XP. Although Windows 9x runs DOS programs natively, games specially can show a number of memory and compatibility problems--as anyone who used Windows 9x back in the day may know. This is why for DOS games I recommend DOSBox instead.So you'll need an installation disk for Windows 95, 98 or Me: 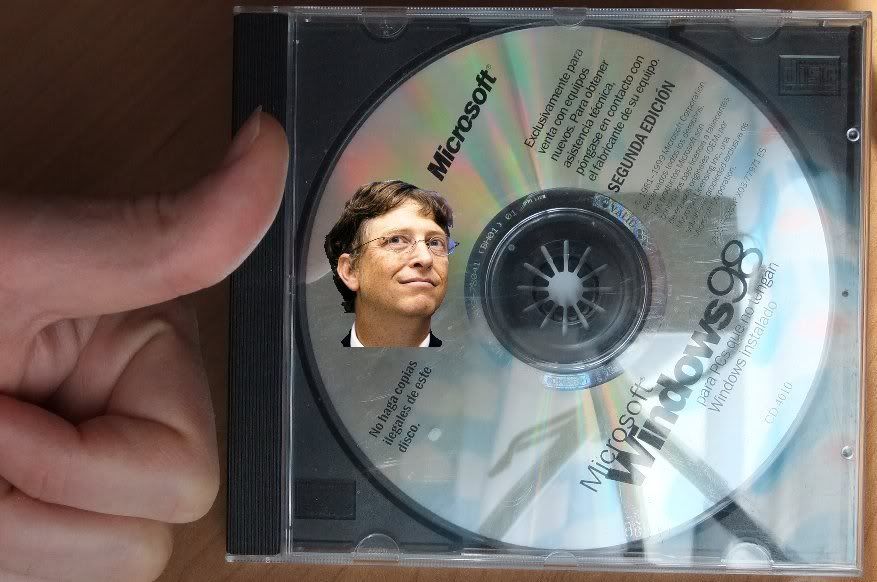 Now we have to install the virtualization software. There are several options, here I recommend Microsoft's Virtual PC, whose features are:
The version of Virtual PC you need depends on your host Windows version.
OK let's run Virtual PC and click on that "New..." option. As I said the above image will be very different for the Windows 7 version of Virtual PC, much like a regular folder with VMs appearing as files. There may be a "new machine" option and a "new disk" option: you want a new machine, which includes its virtual hard disk of course. The "New Virtual Machine Wizard" will start. It's really straightforward and we can continue by clicking the "next" button continuously. 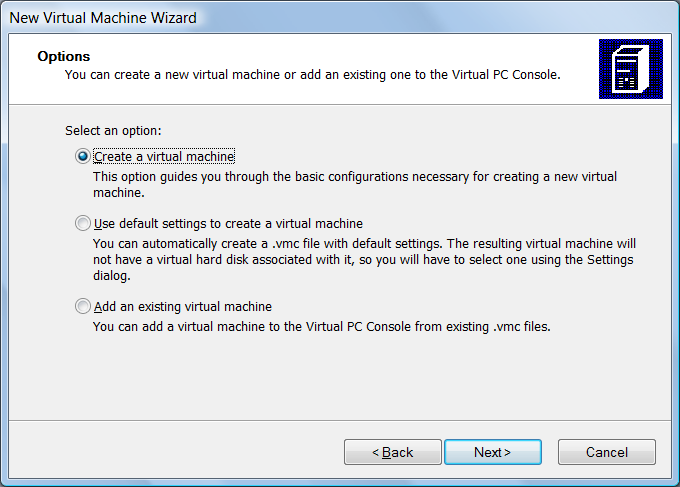 Give the VM any name you like. Eventually you'll reach the dialog where you can choose the operating system you'll be installing. This is so that Virtual PC tailors the virtual hardware, but it doesn't mean Virtual PC will install the operating system for you, you'll still have to do it yourself. Pick the closest one, for example if you plan to install Windows 95 but there's only a Windows 98 option, pick it; there's little difference anyway besides RAM and hard disk size, and this can be customized. 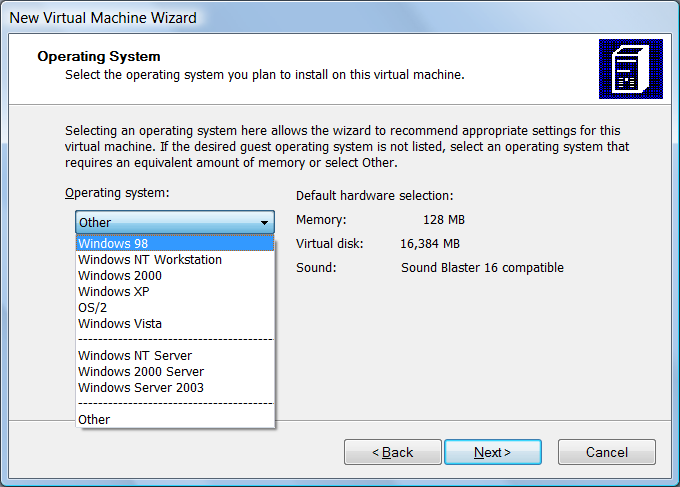 Next you'll be asked if you want to adjust the amount of RAM (memory) the virtual machine will have. This is no biggie, as you'll be able to adjust this at any time after you've set it up, as long as the VM's shut down, via its "settings". The amount needed depends entirely on the programs you want to run in it. Microsoft markets Virtual PC as a compatibility solution for business to run legacy apps (as I said it doesn't support direct access to graphic hardware), so its default for Windows 98 is only 64 MB. If you want to play Civilization II for example, that's more than enough; for Baldur's Gate it would be too little. It's your call, and as I said you can change this at any time in the future. If the wizard asks if you want to create a new virtual hard disk or use an existing one, choose the former as you don't have any at this point. Don't worry about the size of the virtual hard disk, but make it ample for your future needs. It won't take as much space in your real hard disk as the capacity it has, only according to its usage, and it will be expanded automatically as necessary as you use the space. What you shouldn't disregard completely in the future is defragmenting both your host and guest disks once in a while when necessary, or else performance might drop. Finally you'll end up with a new virtual machine, ready to use. Well not so ready. If you double-click on it to fire it up, and the Windows 9x installation CD is not inserted, what you'll find is a (virtual) computer without any operating system installed, something that might look intimidating because most people don't see it very often.  So before rebooting, make sure to insert the installation CD, and if you had already booted the VM, the CD icon in the status bar at the bottom of its window should enable (when there's no CD it's grayed out; you can see this in the images above). In this status bar there are icons for the virtual hard, CD and floppy drives and the network connections of the virtual machine. By right-clicking on these icons you can configure those things, for example you can mount disk image files on the virtual CD or floppy drives (but don't worry about that at this point), or you can make it use our real CD drive as you're doing now. Besides this status bar at the bottom of the virtual machine's window, at the top below the title bar as usual there's a menu. It's from here that you can order the virtual machine to reboot or shut down, or you can find the "close..." option, which is the same as closing the VM's window. In the settings, accessible from this menu or by selecting this VM from the main Virtual PC window shown above which lists all installed, we can configure what happens when we close the VM in this way. Virtual PC provides the option to save the state of the machine, so that the next time we start it we don't need to wait for it to boot; this is the same thing as hibernating. Now reboot (the virtual guest machine, not your real host!) by clicking on the appropriate option in the menu, and the VM will boot from the installation CD. It's possible that you have to navigate some menus, in that case choose to boot from the CD and to start the Windows installation--not just going to the command prompt. If you get lost just reboot again. 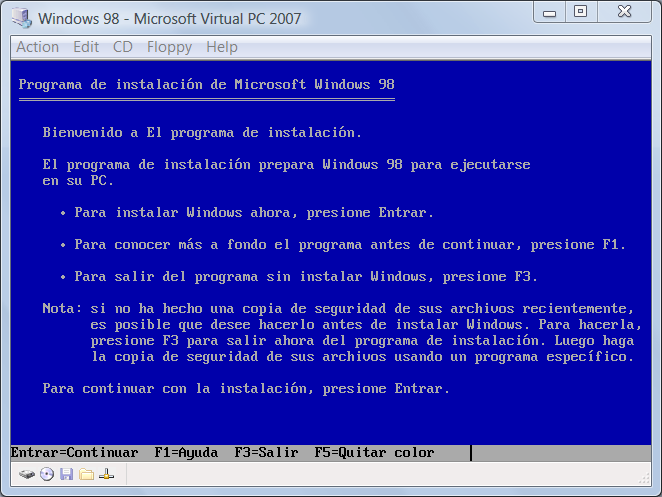 If this works OK skip this whole paragraph and the next one. If you get the same result as before (no boot media/device) with the CD inserted, first right-click on the CD icon on the status bar and check the VM's window menu, to make sure that the VM is using your real CD drive for its own virtual one. Also explore the CD in your host to make sure its contents are OK. If everything looks correct, it may still happen that your installation CD isn't bootable. It should come with instructions, for example "boot from the CD" or "run X:\setup.exe where X is your CD drive". If it's not bootable you'll need a bootable floppy, which will boot to a command prompt where you can launch the installation (by typing "E:\setup" for example). Click here or here or here to download a boot disk image file, and save it to any location. Then right-click on the floppy icon on the status bar of the VM's window, choose to capture a floppy disk image file, and select the file you just downloaded. Then reboot the VM again, and in the start menu choose "start with CD-ROM support", it should take you to a command prompt where you can type whatever you have to in order to start the installation from the CD, which will have the letter E: assigned. It's also possible that some installation disks can't perform the partition of the hard disk, and will tell you that you must do it yourself beforehand (lousy service those days). But try running the installation CD directly first. Only if it doesn't work and tells you to make the partition, you'll have to enter "FDISK" into the command line. Answer "S" (yes) if you're asked about large disk compatibility, then select options 1, 1, answer "S" (yes), pres Escape to exit Fdisk, then enter "FORMAT C:" into the command line, answer "S", wait, press Enter, and finally reboot the VM. Installing Windows is a matter of waiting and following simple instructions, you hardly need any knowledge. If you're asked about compatibility with large disks or FAT32, choose to enable it. I'm mentioning this because it's not the default option. The first time the VM enables mouse input and you click on the VM's window, you'll see a warning. Virtual PC will hijack the mouse so that you can't use it outside the VM until you press a key combination that you're informed about. This is similar to DOSBox and its Ctrl+F10 key combination, but for virtual PC the keys are different. It's ugly but don't worry, we'll fix this afterwards so that mouse input is integrated between the real host and the guest VM.  You'll be asked to validate your Windows license for the copy you're installing. As long as it's legit, the license key (a letter sequence like "AAAAA-AAAAA-AAAAA-AAAAA-AAAAA") should be written on the case or the booklet of the installation CD, or on a sticker on the CPU it came installed on, or on the Windows documentation. Eventually the installation will be over, but you still have one last thing to do. Virtual PC should have prompted you to install "Virtual Machine Additions" (or "integration features" in the Windows 7 version); at any rate this can be done from the menu of the VM's window. 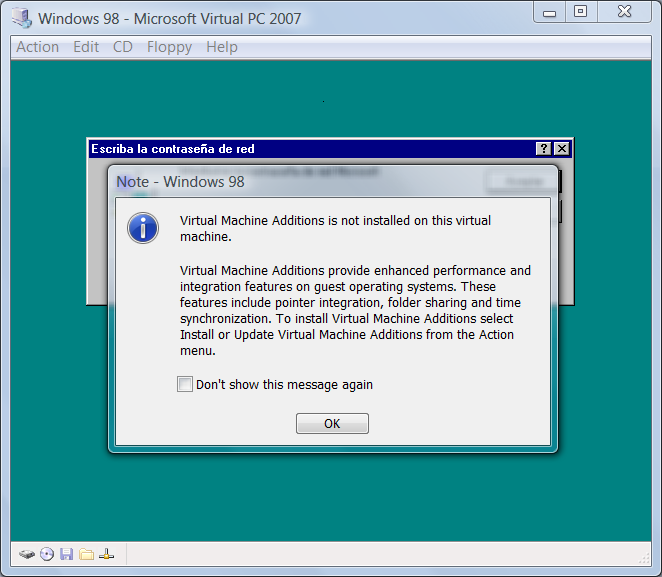  This is like a regular installation on the guest VM; you'll have to reboot the VM to complete it. Furthermore you could un-install it in the future (although I can't think of a reason why you would want to) from the "add/remove programs" item in the control panel. What it does is making your life so much easier by integrating the mouse pointer between the host and the guest, so you don't have to worry any longer about the guest capturing it and you having to recover it to use the host. And more importantly you'll be able to copy files and folders to and fro the guest and the host by simply drag'n dropping them. You might be surprised or disappointed how little the VM window looks in your host desktop. This is easy to fix, and it's due to the simple fact that a fresh Windows 9x installation defaults to an old, puny, coarse 640x480 resolution and 256 colors only (those were the days!), and nowadays it's normal to have around 1920x1080 and of course 32-bit deep color. But Windows 9x and the hardware emulated by Virtual PC supports many larger resolutions, and if we increase its resolution the VM will take up a larger part of our host desktop area. To change it just right-click on an empty area of the desktop inside the guest VM, and select "properties", and in the ensuing dialog go to the "settings" tab. 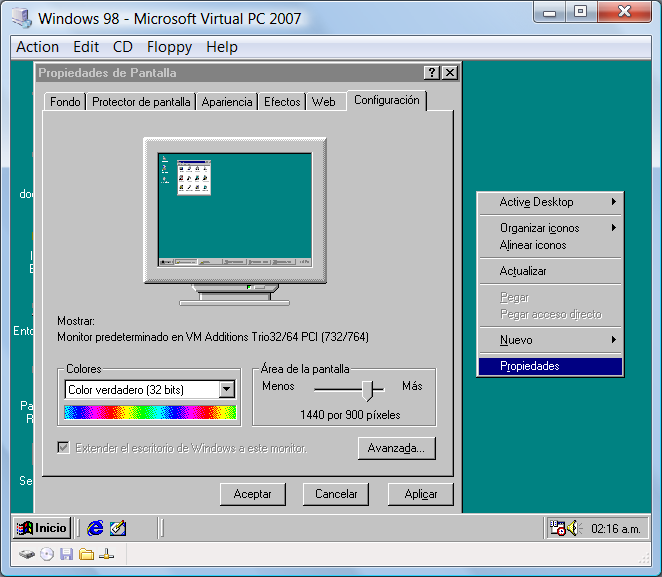 It's of course also possible to use the VM in full screen, instead of as a window. You can change between both modes from the menu or by means of a key combination, or in Virtual PC for Windows 7, by maximizing the VM's window. We're done, I'm sure I don't need to explain to you how to install your own games on Windows. Enjoy! Last edited by Japo; 27-07-2013 at 07:10 AM. |
||


|
|
|
12-02-2012, 07:57 AM
|
#2 | ||
 Join Date: Aug 2007
Location: Dixmuide, Belgium
Posts: 2,767
|
Nice tuto Japo.
Maybe add that not all older W9X CDs were bootable, then you need the CD plus a bootfloppy mounted to be able to install W9X. W9X bootflop@ http://www.bootdisk.com/ Note for absolute beginners: correct boot device priority must be set in VPC BIOS, hit DEL when booting W9x guest.
__________________
Not a member of The Victorious People's Shoutbox Liberation Army. Not a member of the GAG Guerrilla. Don't get A Grip! FOR RENT *Advertising space* |
||
|
|
|
|
12-02-2012, 01:00 PM
|
#3 | ||
|
Join Date: Mar 2006
Location: ,
Posts: 4,615
|
Thanks, added a paragraph about it. I don't think it's necessary to change the boot devide priority in the BIOS, at least I didn't have to. As long as there's no bootable disk in a drive, the BIOS will fall through to the next one; and as long as there's a boot disk in only one of the drives, the machine is sure to boot from it.
__________________
Life starts every day anew. Prospects not so good... Last edited by Japo; 12-02-2012 at 05:09 PM. |
||
|
|
|
|
12-02-2012, 02:10 PM
|
#4 | ||

 Join Date: Oct 2004
Location: Opole, Poland
Posts: 14,276
|
I'd like to note that the VM Additions don't always work as expected. This might vary depending on the guest operating system, but I once installed them and had to recreate the machine in question all over again. That was Win 98 SE if my memory serves, in Virtual PC 2004.
__________________
 "God. Can't you people see I'm trying to commit a crime against science and nature here?" -- Reed Richards |
||
|
|
|
|
12-02-2012, 05:08 PM
|
#5 | ||
|
Join Date: Mar 2006
Location: ,
Posts: 4,615
|
Funny that you should mention it, because the exact same thing happened to me, with Windows 98 SE too. This tutorial was made with that Windows version as well. If it was a bug let's hope they've ironed it out by now, the current version of VPC is 2007 SP1. Third party software may interfere, at work some drivers from National Instruments broke my XP Mode. The convenience of the additions is too great to do without them. People can always start over if something goes wrong. You can always make a backup of the virtual hard disk, and it will allow you in the future to roll your VM back to that previous state.
__________________
Life starts every day anew. Prospects not so good... Last edited by Japo; 12-02-2012 at 05:19 PM. |
||
|
|
|
|
27-06-2013, 09:19 PM
|
#6 | ||
|
Join Date: Mar 2006
Location: ,
Posts: 4,615
|
Oh boy. New version of Windows, new version of VPC.
http://windows.microsoft.com/en-us/w...rtual-machines Quote:
Windows 7: http://www.microsoft.com/en-us/downl...s.aspx?id=3702 Vista/XP/Server: http://www.microsoft.com/en-us/downl....aspx?id=24439
__________________
Life starts every day anew. Prospects not so good... |
||
|
|
|
|
28-06-2013, 02:10 AM
|
#7 | ||

   Join Date: Apr 2012
Location: ,
Posts: 57
|
Nice job, Japo. I can tell you put your own hard work in this tutorial.
 Oh, and if any non-Windows users want to use a VM, use QEMU with some graphical front-end. It's available for Windows and most *nix systems.
__________________

|
||
|
|
|
|
24-12-2015, 04:12 PM
|
#8 | ||
  Join Date: Dec 2015
Posts: 1
|
Hello, thanks for this tutorial, it really helped me. I have Windows 95 installed inside Virtual PC, but when I open the Windows 95 VM, it doesn't recognize the CD-ROM I put in my laptop. Do you know a solution for this?
|
||
|
|
|
|
25-12-2015, 09:01 AM
|
#9 | ||
|
Join Date: Mar 2006
Location: ,
Posts: 4,615
|
Go to the "CD" menu, there you can choose to use that physical drive, or to mount an image file, or unmount everything. Probably you have one of those other options currently selected.
__________________
Life starts every day anew. Prospects not so good... |
||
|
|
|
|
06-02-2016, 05:38 AM
|
#10 | ||
|
Join Date: Dec 2013
Posts: 2
|
Dear Japo your post excellent and very useful information for us thanks so much
|
||
|
|
|

|
|
 Similar Threads
|
||||
| Thread | Thread Starter | Forum | Replies | Last Post |
| I need a Java tutorial... | Fubb | Programming | 12 | 13-04-2009 10:26 AM |
| Virtual Pc With 3d? | jg007 | General compatibility fixes | 9 | 29-12-2007 04:32 PM |
| Virtual Pc | Mara | General compatibility fixes | 10 | 27-08-2007 05:43 PM |
| A Tutorial By Magic | Sean | Art Tutorials | 19 | 09-02-2006 09:58 PM |
|
|
||


 Linear Mode

