Dear Abandonia visitors: Help us keep Abandonia free with a small donation. Abandonia is like an old gaming arcade with only original games. Abandonia helps you have fun four hours and years. If Abandonia is useful to you, please help us forget fundraising and get back to Abandonia.


Now that we are done with installation and setup, let's start DOSBox for the first time. Select DOSBox shortcut from the Start Menu. After programs open, it should look somewhat like this:
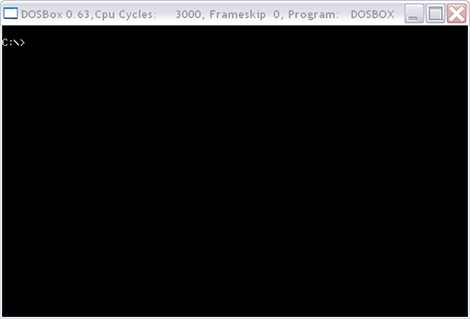
This is called command prompt. Here you will be able to type DOS commands, and to install and start games.
To be able to use DOSBox, you have to know some basic commands!
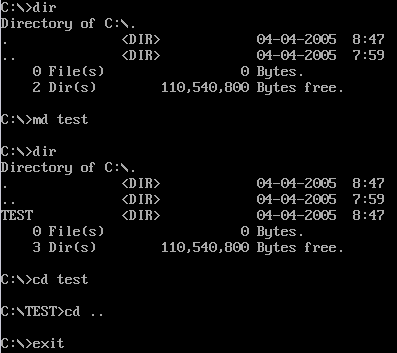
To display contest of current directory (in this case root directory of drive C) type "dir" and press enter. You will get 4 lines output. Third line will say "0 Files(s) 0 Bytes." Because we did not install any games, our C drive is empty. (After this tutorial, most likely this will change :-))
Next command is mkdir. This command will create new directory. Just type "md test" and press enter. This will create new directory called "test" on C drive.
To cahnge direcotry use CD command. "cd test" will change current directory to "test". Notice that command prompt now says "C:\TEST>". To move back to root directory (top directory) use "cd \" command. To move only one directory back use "cd .." command.
To delete test folder, use "rd" command. We will not delete test folder yet, as I would like you to see there that folder has been created. You can delete it later, when you back at root directory (at the root directory command prompt is "C:\") just type "rd test".
Last basic command that we will use is "exit". As its name says, it will exit DOSBox.
So we will try it too. Types exit in the DOSBox command prompt and after it closes, open your CDrive subfolder. You will see that there is TEST subfolder in it.
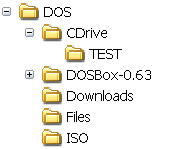
This is one that we just created in DOSBox. Just select it, and press "Delete" button on your keyboard to delete it, as we will not use it any more. So you should notice that folder CDrive is mounted to C drive in DOSBox, so we can start with installation of games.