 29-10-2005, 05:31 PM
|
#1 | ||

    Join Date: Oct 2004
Location: Wimbledon, England
Posts: 1,624
|
--
Step 1 Create a new document with the following settings 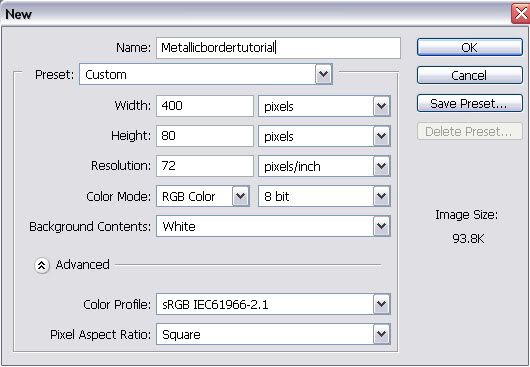 Step 2 Either create a basic image using this Or if you prefer simply take an image from Google. (Ive decided to create a new image from scratch practice makes perfect LOL)  Step 3 Create a new layer (Shift Ctrl + N) 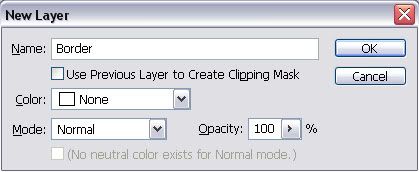 Step 4 Select the Polygonal Lasso Tool.  If you cannot see it look for the regular lasso tool  Right click the regular lasso tool and you will be greeted with the following menu 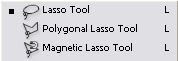 Select the Polygonal Lasso Tool. Step 5 Click within your image (make sure the Polygonal Lasso Tool is selected). It is most helpful if you click a small length below the top right corner. Id recommend about half a CM underneath the corner and half a CM inwards from the right side. This point is the origin of your border. Now you must click somewhere else within your image. The distance between the two points will be connected with a line. Click multiple times around the image and then return to your origin point. I hide my image to make the selection process easier. 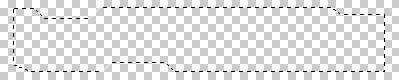 Hint: If you hold shift whilst using the tool it will only allow you to move the cursor to a position that will create a straight line. This is useful when you want to create straight diagonal lines. Step 6 At the top of the screen there should be a toolbar with the following. File Edit Image Layer Select Filter View Window Help If you click on select and then inverse your selection should now be reversed. 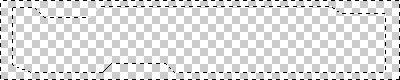 Step 7 Fill your selection with the paint bucket tool. I recommend you use a grey colour. If like me you hide your image to help you during the selection process I recommend you make it visible again.  Step 8 In the layers window right click the layer entitled Border. Select blending options. Step 9 Tick the Inner Shadow box and use the following settings 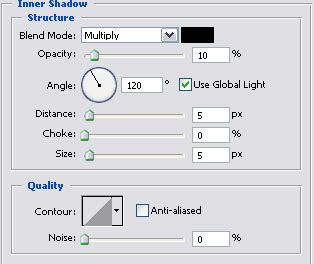 Tick the Bevel & Emboss box and use the following settings. 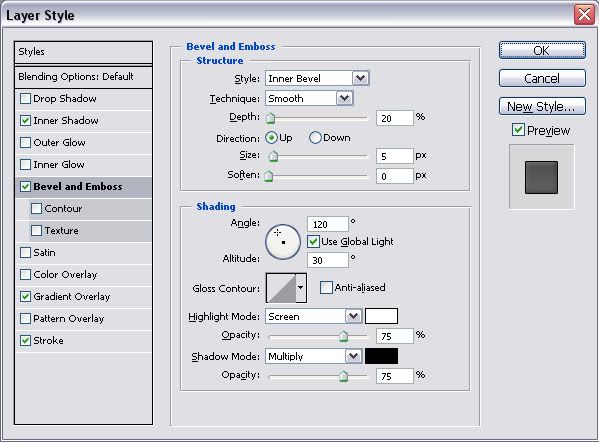 Tick the Gradient Overlay box and use the following settings. 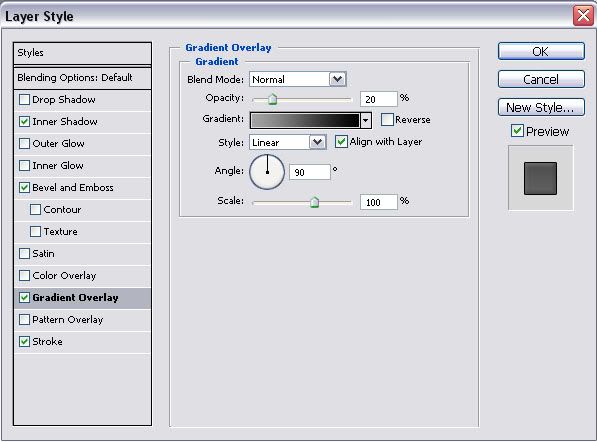 Tick the Stroke box and use the following settings. 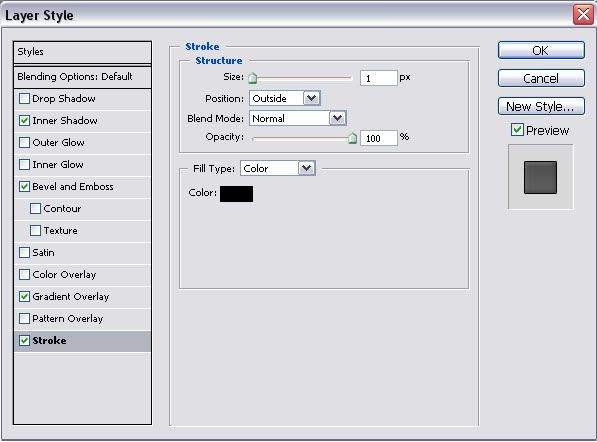 Press OK 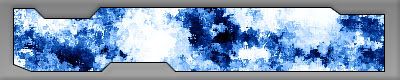 Your border is now complete however Ive used very basic settings to create this metallic effect and I advise you spend a few minutes tweaking the settings to your liking. Also I recommend you experiment with pattern overlays as they can really add depth to your border.
__________________
|
||


|
|
|
|
 Similar Threads
|
||||
| Thread | Thread Starter | Forum | Replies | Last Post |
| I need a Java tutorial... | Fubb | Programming | 12 | 13-04-2009 10:26 AM |
| Painless Ftp Tutorial | The Fifth Horseman | Old News | 10 | 07-08-2007 09:55 AM |
| Little Help With The Doxbox Tutorial! | Guest | Troubleshooting | 18 | 03-08-2007 05:27 PM |
| Help With The Dosbox Tutorial. | gamebounty | Tech Corner | 28 | 21-02-2006 04:52 PM |
|
|
||


 Threaded Mode